
Sunspire – Northern Elsweyr Trial
Trial Preparation
- 2 Tanks
- 2 Healers
- 8 Damage Dealers
First Boss – Lokkestiiz
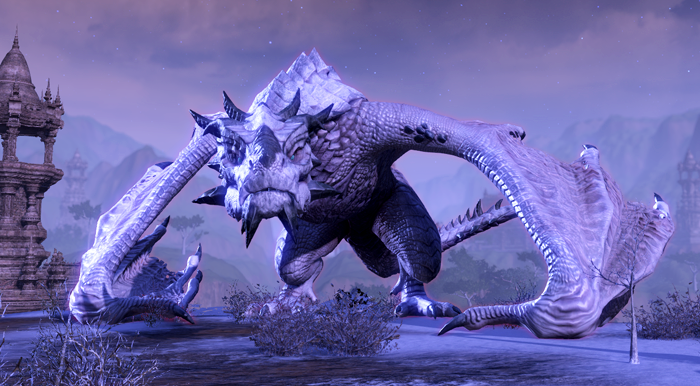
Mechanics
- Frozen Tombs
- A player needs to enter the tomb AFTER it lands, and a healer needs to heal the player to full health quickly or the tomb will explode, likely resulting in a wipe
- NOTE the player must be above 70% health when they enter the tomb or they will immediately explode- wiping the group
- The tomb will leave a debuff on the player that will cause them to explode if they re-enter before it wears off
- For this reason, you need 3 tomb runners ( 3 players total)
- They are known as Tomb 1, then Tomb 2, and finally, if you don’t burn the boss fast, enough you will need the final tomb runner to take Tomb 3
- The tomb rotation repeats until the dragon takes flight and then starts over at Tomb 1 when he lands
- A player needs to enter the tomb AFTER it lands, and a healer needs to heal the player to full health quickly or the tomb will explode, likely resulting in a wipe
- Frozen Beam
- While in flight, the dragon fires a frozen beam across the arena that MUST be blocked or you will die
- 80% Beam comes at the end of his flight
- 50% Laser comes immediately- be prepared to block right away
- 20% Beam comes after a while
- While in flight, the dragon fires a frozen beam across the arena that MUST be blocked or you will die
- Adds
- Storm Atronachs: the damage dealers must kill these so the tank can pull the Frost Atronachs into the storm prisons left behind when a Storm Atro dies
- Frost Atronachs – Damage dealers should not need to kill these, but if some are left alive with low HP, they will need to be finished off
Tanks
- MT : Will tank the dragon and ensure the dragon breath is not pointed at group members
- OT : Will gather adds that spawn for the group
Healers
- Tomb Healer: should be ready with huge burst healing capabilities
DPS
- Be sure to stay out of the red during add phase. If you die to a forecasted frost atro cleave, its your fault!
- Block during frost beam
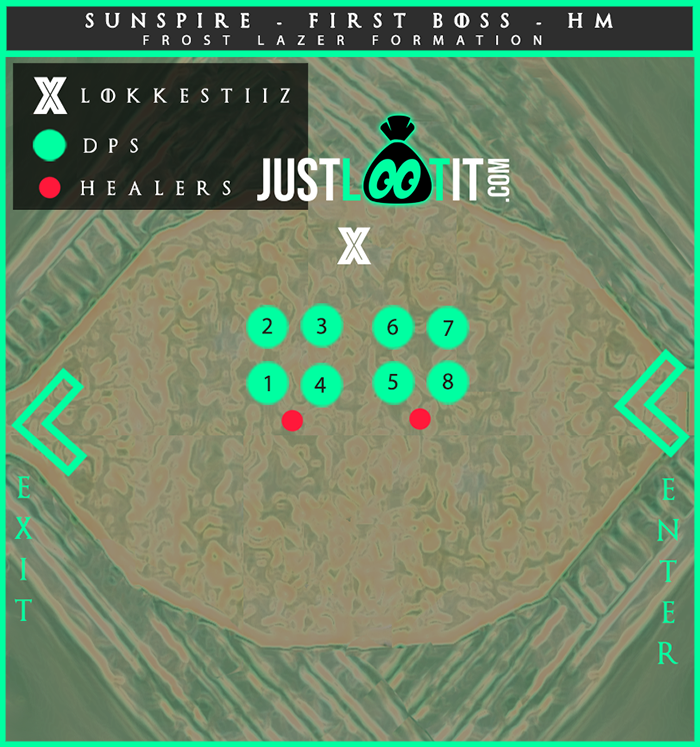
HardMode
- Frozen Tombs
- Two Tombs spawn at a time now instead of just one
- For this reason, you need 3 pairs of tomb runners (6 players total)
- They are known as Tomb 1-1, Tomb 1-2, then Tomb 2-1 and 2-2, and finally, if you don’t burn the boss fast enough- you will need the final pair of tomb healers to take Tomb 3-1 and 3-2
- Frost Beam
- Will now leave a shock AoE circle on every player that will require players to be healed and/or heal themselves
- If two players’ circles overlap- they will both die
- Flame Atronachs
- The boss will now spawn Flame Atronachs that should be cleaved down- when they die, they can explode after a time, so be sure to step away from them in that event
Tanks
- Same as non-hard mode, everything hurts more.
Healers
- Be prepared to heal tombs within 8 seconds
- Be prepared to heal group after frost beam
DPS
- Get into position after frost beam to receive heals
- Step out of Flame Atronach explosion when it dies
Second Boss – Yolnahkriin
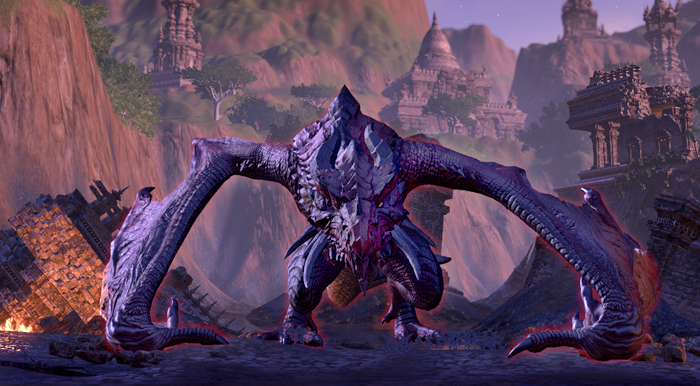
Mechanics
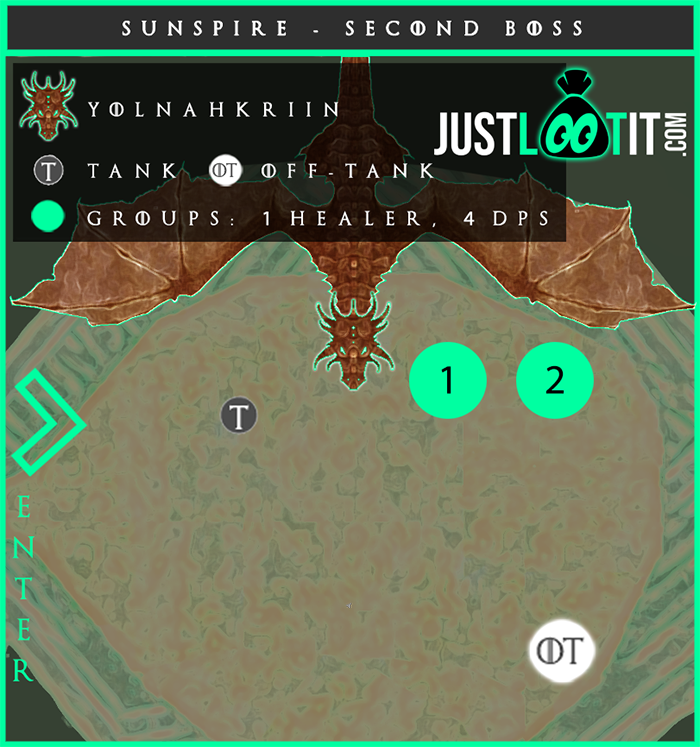
- Formation
- Tank stands to the left
- Off Tank – Stands back on edge of arena
- Group 1 – stands on head
- 1 Healer, 4 Damage Dealers
- Group 2 – Stand to the right so the fire explosions from on one group do not hit the other
- 1 Heaer, 4 Damage Dealers
- Flight – 75%, 50% and 25%
- All but the very outer edge of the arena will be covered in fire. For this reason, all players must sprint to the edge of the arena when the boss takes flight
- Adds
- Flame Atronach
- Must be killed before the fire in the middle of the arena clears or they will leave a large lava pool on the ground
- Iron Servants
- Must be tanked on the edge, will receive a debuff from the dragon fire during the flight phase that makes them killable.
- Kill these after the flame atronachs and before returning to the dragon
- Flame Atronach
- Hardmode
- Flame atronachs will now enrage if alive too long
- Everything hits harder and has more HP
Tanks
- MT: avoid standing in the fire circles placed under you as they will allow the boss to kill you
- OT : Gather adds along the edge so your DD’s can quickly kill them when the dragon takes flight
Healers
- Be ready to burst heal through fire explosions
DPS
- Stay in stack during explosions
- Block last explosion tick if you need to
- Kill small fire atronachs first when dragon takes flight
Third Boss – Nahviintaas
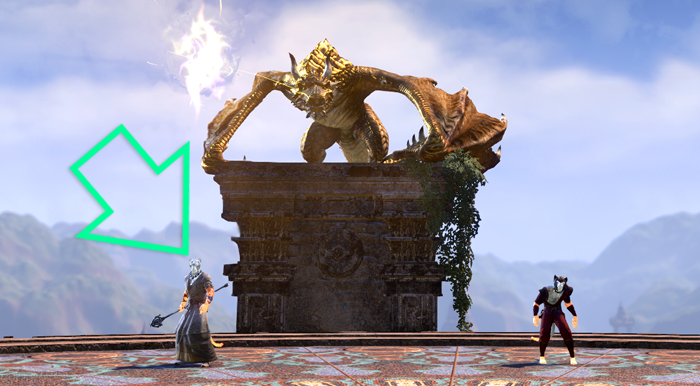
Mechanics
- Flight – 80% , 60%, 40%
- The hardest part of this fight is the adds that spawn each time the boss takes flight- stack and kill as quickly as possible and focus Alkosh’s Fate
- Adds left alive for too long will enrage
- After the adds are killed
- The middle of the arena will explode and players must hide behind the statues to survive
- Portals
- 3 players must go down into the portal to dps the mini-boss down there
- Failure to kill the mini-boss will result in a group wipe
- If players stand in timetop upstairs, downstairs players get a synergy they can pick up to increase their damage
- Slow damage on boss if necessary to make sure you do not push the boss into flight phase before portal team is back upstairs
- 40%
- 3 players will have meteor cast underneath them. These players must take this to the perimeter of the arena so that the dot it leaves on the ground is away from the group
- Hardmode
- Vigil Statue
- Can only be damaged while channeling, therefore you must allow it to channel in order to kill it
- The longer it channels, the more damage each explosion does
- Interrupt the statue to stop the channeling damage when it gets too painful
- Portal
- The portal team has 90 seconds to kill the boss. each of the 3 portal members will need to do roughly 40,000 dps to kill the mini-boss in time.
- Slow damage on boss if necessary to make sure you do not push the boss into flight phase before portal team is back upstairs
- Vigil Statue
Tank
- MT: Tank the dragon and face him away from group
- OT: pull flame atronachs into the cleave damage on the boss
- HM: Tank the vigil statue when it comes to life
Healers
- Be ready to heal tank through the burst damage caused to them during the flame breath
- Be ready to place meteor in execute at perimeter of arena
DPS
- Save ults for add phases. The dragon is the easy part of this fight
- Be ready to place meteor in execute at perimeter of arena
- One person should step into timetop to provide a synergy buff to portal team
More Guides!
[siblings exclude=”current”]
